

Taking great care of your new surgical incision starts with a simple philosophy: keep it clean, dry, and protected from any strain. The first 48 hours are the most important, laying the foundation for your entire recovery by focusing on rest, managing swelling, and keeping infection at bay.
The First 48 Hours After Your Surgery

The first two days after your procedure are truly foundational. Your body is putting all its energy into kicking off the healing process, so your main jobs are simple: rest up, avoid putting any strain on the incision, and keep the area perfectly clean and dry. This isn't the time for complicated care routines; it's about creating the best possible environment for your body to do its job.
Proper incision care is your best defense against complications. Surgical site infections (SSIs) are a real concern, affecting between 1.2% and 23.6% of surgical procedures across the globe. In the United States, where millions of cosmetic procedures happen each year, about 5% of surgeries result in an SSI.
For patients who've had a tummy tuck or breast augmentation, simply leaving the incision alone and keeping it dry during this initial 48-hour window drastically cuts down this risk.
Immediate Priorities: Rest And Positioning
Rest is not just a suggestion—it’s an active part of your recovery. While you should get up and walk for a few minutes every couple of hours to keep your circulation going and prevent blood clots, most of your time should be spent resting. How you position yourself is just as important for managing swelling and making yourself comfortable.
- For Body Procedures: If you had a tummy tuck, lie on your back and prop pillows under your knees. This helps your abdominal muscles relax and takes tension off the incision line.
- For Breast Procedures: Sleeping on your back in a slightly elevated position—maybe in a recliner or propped up with several pillows—is ideal. This reduces swelling and stops you from accidentally putting pressure on your incisions. Our detailed guide on breast lift recovery offers more week-by-week positioning advice.
This isn't just about comfort. Strategic positioning actively reduces inflammation and strain, which are huge factors in how your incision heals and, down the road, how your scar will look.
Here's a quick checklist to help you navigate those critical first two days with confidence.
Immediate Post-Op Incision Care Checklist (First 48 Hours)
| Action | Why It's Important | Dr. Bain's Pro-Tip |
|---|---|---|
| Keep the Dressing Dry | A dry environment prevents bacteria from growing and causing an infection. | Don't shower yet. Stick to sponge baths, and be very careful to avoid splashing the bandaged area. |
| Do Not Remove the Dressing | The initial dressing is sterile and is your primary barrier against germs. | It’s tempting to peek, but resist! This dressing was applied in a sterile operating room for a reason. |
| Rest and Elevate | Rest allows your body to direct energy to healing. Elevation helps drain fluid and reduce swelling. | Find a comfortable spot on the couch or in bed. Use pillows to support the surgical area and keep it elevated above your heart if possible. |
| Use Cold Packs (Near Incision) | Cold therapy constricts blood vessels, which minimizes swelling, bruising, and pain. | Never put ice directly on your skin or on the incision itself. Wrap a cold pack in a thin towel and apply it to an adjacent area for 15-20 minutes at a time. |
| Monitor for Excessive Bleeding | A small amount of pinkish ooze is normal, but heavy bleeding is not. | If you see bright red blood soaking through your bandage, don't wait. Call your surgeon’s office right away. |
| Walk Gently Every Few Hours | Light movement promotes blood flow, which is crucial for healing and preventing dangerous blood clots. | A slow walk to the kitchen or bathroom is enough. This isn't exercise; it's about promoting circulation. |
Think of this table as your guide to getting through the first 48 hours smoothly. Following these simple steps sets you up for a much easier recovery journey.
Managing The Initial Dressing And Swelling
That first dressing applied in the operating room is sterile and acts as a shield. It can be tempting to peek underneath, but your only job is to leave it completely untouched and keep it dry.
You might notice a tiny bit of pinkish or clear fluid on the gauze. This is normal oozing and is nothing to worry about. But if you see significant, bright red bleeding that soaks through your dressing, that’s a sign to contact your surgeon's office immediately.
A Pro-Tip on Differentiating Bruising: Expect to see some bruising around the incision. It can look pretty dramatic, with shades of purple, blue, and even yellow. This is a totally normal response to surgery. The key difference between normal bruising and a problem like a hematoma is that bruising doesn't come with a firm, painful, and growing lump under the skin.
Cold therapy is going to be your best friend for managing both pain and swelling.
- Apply a cold pack (a bag of frozen peas wrapped in a thin towel works great) to the area near the incision.
- Never place ice directly on your skin or right on top of the incision itself.
- Use it for 15-20 minutes at a time, several times a day.
This simple step helps constrict blood vessels, which in turn minimizes swelling, numbs the area for pain relief, and reduces bruising. By really focusing on rest, good positioning, and managing swelling in these first 48 hours, you’re paving the way for a smooth and successful recovery.
Managing Dressings and Cleaning Your Incision
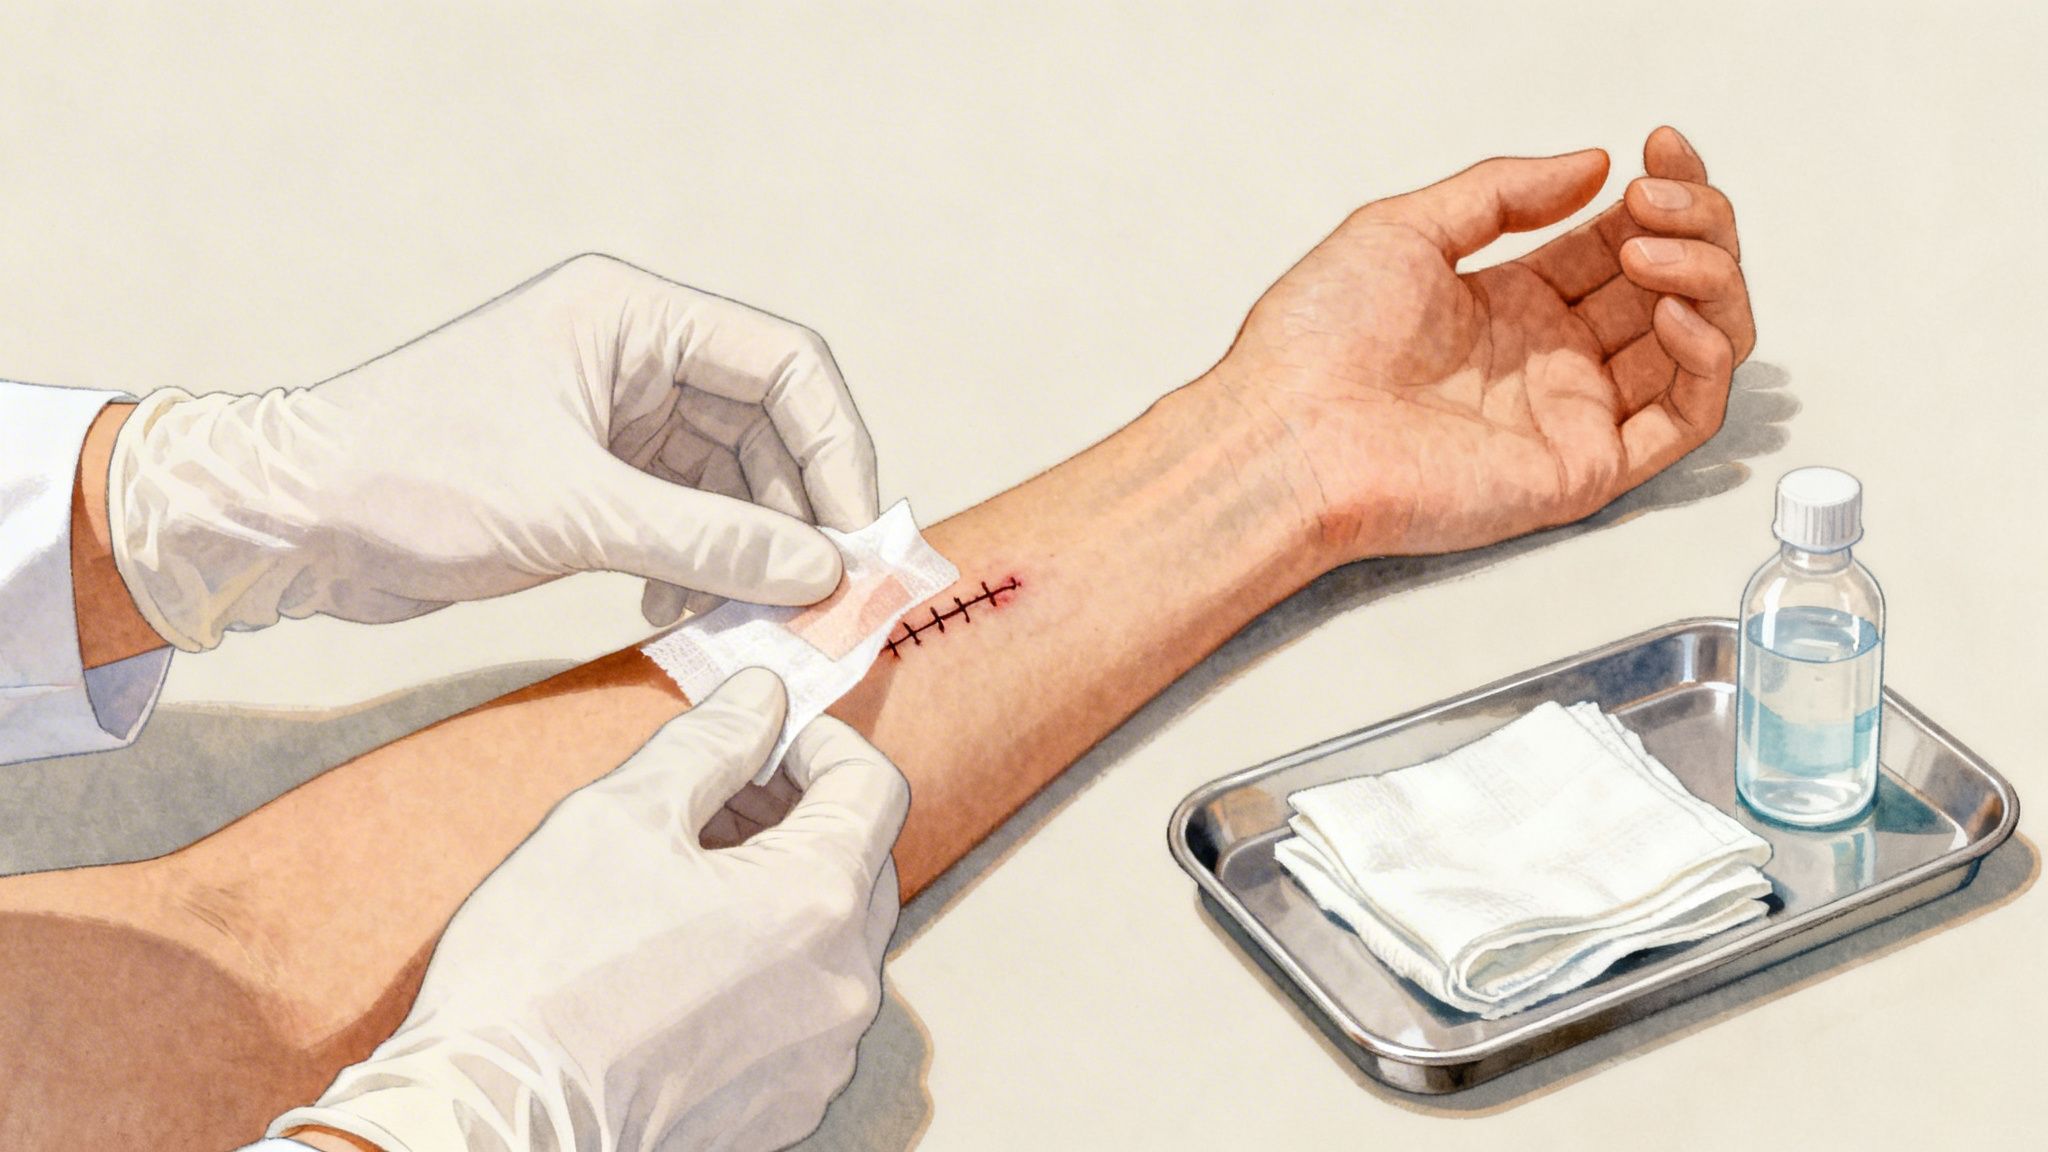
After the first 48 hours, your job shifts from simply resting to taking a more active role in your incision care. We're moving beyond just protecting the wound and into the phase of actively managing the dressing and gently cleaning the site. What you do here has a real impact on how you heal and what your final scar looks like.
This isn't as complicated as it sounds. We'll give you precise instructions on timing, but most patients are ready to change their first dressing within a few days of surgery.
The Right Way to Change Your Dressing
Before you touch anything, the most critical step is to wash your hands. Use soap and warm water, and scrub for at least 20 seconds. This is your number one defense against introducing bacteria to your healing incision.
When you’re ready, gently peel back the old dressing. Pull the tape parallel to your skin, not upwards like a bandage in the movies. If the adhesive is being stubborn, a little warm water on a cloth dabbed at the edges will help it release without irritating your skin.
This is your first real look at the incision, so take a moment to observe. Note the color and check for any new or significant swelling. Look at the old bandage—a little clear or light-yellow fluid is normal. Anything else is worth making a note of to tell your surgical team.
Once the old dressing is off, wash your hands again. This simple step ensures you don’t transfer any germs from the old bandage to the clean incision.
Gentle Cleaning for Optimal Healing
The golden rule for cleaning your incision is to be gentle. Harsh chemicals often do more harm than good, so forget about hydrogen peroxide or rubbing alcohol. They are far too aggressive and can actually kill the delicate new cells your body is working so hard to produce.
Instead, we recommend one of two simple methods:
- Mild Soap and Water: Use a very gentle, fragrance-free soap. Lather it in your hands and just let the sudsy water run over the incision.
- Saline Solution: We may provide a sterile saline wash, but it’s also easy to find at any pharmacy.
Use a soft, clean cloth or sterile gauze to gently pat the area. Always pat from the center of the incision outward to avoid dragging any surface bacteria into the wound itself. Never, ever scrub the incision line.
After cleaning, pat the area completely dry with a fresh piece of gauze. A damp environment trapped under a bandage can become a breeding ground for bacteria. Keeping the area dry before applying a new dressing is crucial for proper healing.
Customizing Care for Different Closures
Not all incisions are closed the same way, and your care should reflect that. Your post-op instructions will be specific, but here's a general guide.
- Traditional Stitches or Staples: These require you to be extra careful when cleaning around them to avoid snagging a stitch.
- Dissolving Sutures: These are buried under the skin, so you'll just be cleaning the surface. Your incision may be supported with surgical tape (Steri-Strips).
- Surgical Glue (Dermabond): This glue creates its own waterproof barrier. You can usually get it wet, but don’t scrub it or soak it in a tub. The glue will start to flake off on its own in about a week or two.
Daily monitoring is key, especially after procedures like a tummy tuck or rhinoplasty. Surgical Site Infections (SSIs) are a real risk, so being diligent helps you catch any potential issues early. Plan to change dressings as directed—usually every 1-3 days—and don't even think about soaking in a bath or pool for at least two weeks.
Every incision creates a temporary break in the skin barrier, your body's first line of defense. Knowing how to repair a damaged skin barrier is an important part of the healing puzzle. For those who've had body contouring, our specific tummy tuck recovery tips offer more targeted advice. By taking these steps, you are an active and essential partner in your own recovery journey.
Your Guide to Activity and Daily Life Post-Surgery
Navigating your new physical limits after surgery can be tricky. There's a natural urge to jump back into your routine, but pushing your body too soon is one of the biggest recovery mistakes I see. Finding that balance between helpful movement and essential rest is the goal.
Your body is working overtime to heal, and it needs you to be a smart partner in that process. Too much activity can stress your incision, causing it to pull apart or heal with a worse scar. On the other hand, staying completely still isn't the answer either, as that can raise the risk of blood clots and slow down your overall recovery.
The Showering Milestone
Showering is often the first big step that makes you feel human again. Most surgeons will give you the okay to shower within 24 to 48 hours after your procedure, but you'll need to follow some strict rules. The objective is to get clean without putting your incision at risk.
Before that first shower, make sure you know exactly how to protect your wound. If your incision is sealed with waterproof surgical glue or a clear film dressing, you can typically let water run over it gently. For any other type of dressing, you must keep it perfectly dry.
A simple but effective trick is to tape a piece of plastic wrap or a small trash bag over the bandaged area. After you're done, immediately and gently pat the skin around the dressing dry. Never point the showerhead directly at your incision, and it's an absolute no to baths, hot tubs, or swimming until your surgeon clears you. Soaking a healing wound is just asking for an infection.
Reintroducing Physical Activity
Movement is medicine, but the dosage is critical. For the first few days, your "activity" should be nothing more than short, gentle walks around your house every couple of hours. This is crucial for boosting circulation and helping to prevent dangerous blood clots.
As you begin to feel stronger, you can gradually make those walks a little longer and more frequent. Think a slow stroll around your block, not a power walk.
Key Takeaway: Your body will send you signals. If you feel any sharp pain, pulling, or throbbing at the incision site, stop what you're doing. Discomfort is your body’s way of telling you that you’re overdoing it.
Lifting restrictions are not suggestions; they are firm rules to protect your healing tissues. Most surgeons will tell you not to lift anything heavier than a gallon of milk (that's about 8 pounds) for the first 4-6 weeks. This includes everyday items like groceries, laundry baskets, and even small children or pets.
Fueling Your Recovery from the Inside
What you eat and drink has a direct impact on how well your body rebuilds tissue. Think of your body as a construction project—it needs high-quality materials to do the job right.
- Protein is Priority: This is the absolute building block for new tissue. Make sure you’re getting lean sources like chicken, fish, eggs, beans, and Greek yogurt with every meal.
- Stay Hydrated: Dehydration can slow the flow of nutrients to your incision. Keep a water bottle with you and sip on it all day.
- Avoid Smoking and Alcohol: Nicotine constricts your blood vessels, which essentially starves healing tissues of the oxygen they desperately need. Alcohol can interfere with pain medication and cause dehydration. Pausing these habits is one of the most important things you can do for your recovery.
For patients who have more complex medical needs or simply want professional oversight at home, a private nurse at home can offer dedicated clinical support. This can be incredibly valuable for managing wound care and ensuring you're sticking to your activity guidelines. By embracing gentle movement and giving your body the right fuel, you become an active participant in your own healing and help ensure the best possible final result.
Recognizing Infection vs. Normal Healing
One of the biggest anxieties I hear from my patients during recovery is, "How do I know if this is normal?" It's a valid question. Learning to read your body's signals is the key to a stress-free healing process and helps you catch any potential issues early on.
A healing incision is a dynamic thing; it changes every single day. Right at the beginning, you can absolutely expect some mild redness and tenderness right along the cut. This is just your body’s inflammatory response kicking into gear—it’s the essential first step in the healing journey. The key is that these signs should gradually get better, not worse.
This chart helps visualize some of the key decisions you'll be making as you ease back into your daily routine. Smart choices about showering, activity levels, and diet all directly support your incision's healing.
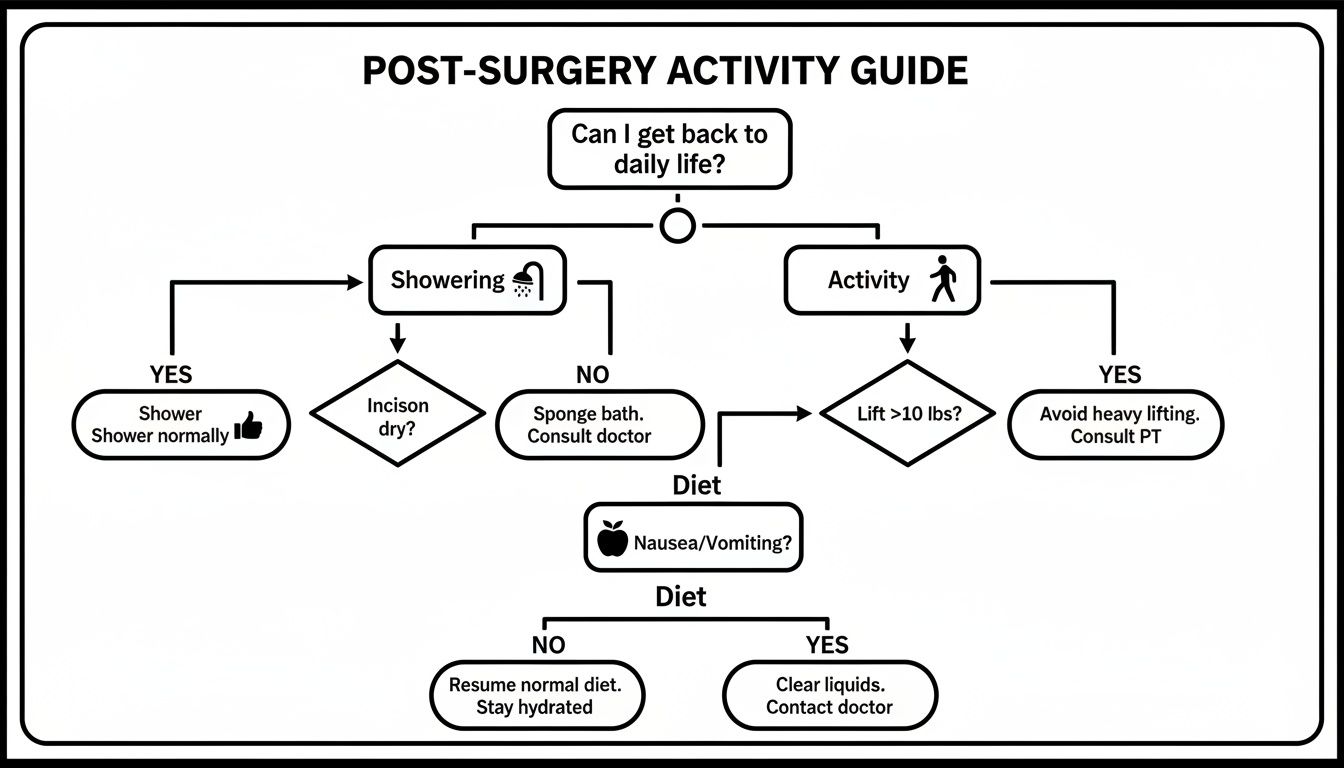
Making the right moves with daily activities like showering, gentle walking, and eating a nutritious diet will bolster your recovery and minimize complications.
Normal Healing vs. Red Flags
The single most important indicator I tell patients to watch for is the progression of symptoms. Think about it: Is the pain a little less today than it was yesterday? Or did it suddenly get worse? Is the redness a faint pink line, or is it starting to spread out like a bad sunburn?
Think of your recovery as a journey of steady, gradual improvement. Complications, on the other hand, usually announce themselves with a sudden negative turn or a slow but steady decline. A wound that was just a bit sore yesterday but is now throbbing and hot to the touch needs immediate attention.
Trust your instincts. If something feels off, it’s always better to call and have it checked out. Catching a problem early is everything.
A simple trick I recommend is to take a quick, well-lit photo of your incision with your phone each day. This creates a visual diary that makes it incredibly easy for both you and your surgeon to spot any subtle changes over time.
Normal Healing vs. Signs of Infection
To help you feel confident in what you're seeing, this table breaks down the crucial differences between a wound that's healing perfectly and one that's sending up a red flag. Use it as a mental checklist every time you care for your incision.
| Symptom | Normal Healing (Expected) | Potential Infection (Call Your Surgeon) |
|---|---|---|
| Redness | A thin line of pinkness right at the incision edges that slowly fades over several days. | Spreading redness that moves outward, gets darker, or develops red streaks radiating from the wound. |
| Swelling | Some mild, soft puffiness around the incision that gradually subsides. | Major, firm, or worsening swelling, especially if it appears suddenly or is much worse on one side. |
| Drainage | A small amount of thin, clear, or pale yellow-tinged fluid for the first few days. | Thick, cloudy, pus-like drainage (yellow or green), or any fluid that has a foul smell. |
| Warmth | The incision might feel slightly warm at first, but this should fade within a couple of days. | The area feels noticeably hot to the touch when compared to the surrounding skin. |
| Pain | Discomfort that improves a little bit each day and is easily managed with your prescribed pain medication. | A sudden spike in pain, constant throbbing that won't quit, or tenderness that is getting worse, not better. |
| Odor | A clean, properly healing incision should have no discernible smell. | Any kind of unpleasant, strong, or foul odor is a major warning sign of an underlying infection. |
Seeing any of the signs in the "Potential Infection" column should prompt a call to your surgeon's office.
When to Make the Call
If you notice anything from that "Potential Infection" column—especially if you also feel generally unwell, have the chills, or run a fever over 101°F (38.3°C)—do not wait. Call your surgeon’s office right away, no matter the time of day. Getting on top of a problem is the absolute best way to make sure a small issue doesn’t become a major roadblock in your recovery.
Long-Term Care for Minimizing Your Scar
Once your incision is fully healed, we shift our focus from immediate healing to long-term scar management. This phase is all about what you do over the next year to influence the final appearance of your scar. Think of it as the finishing touch on your surgical result.
The goal here is simple: help the new scar tissue mature into a flat, soft, and pale line that blends in with your skin. This doesn't happen on its own. It requires a consistent routine built around two critical components: scar massage and serious sun protection.
Starting Your Scar Therapy Routine
I typically give my patients the green light to start scar therapy around 3-4 weeks after their procedure. This is the point when the incision is fully closed, all the scabs are gone, and the new skin is strong enough to handle it.
The first thing I recommend is a silicone-based product. These are widely considered the best non-invasive treatment for scars and come in two easy-to-use forms:
- Silicone Gels: A clear, quick-drying gel you can apply a couple of times a day. They’re excellent for visible areas like the face or on joints where a sheet might have trouble staying put.
- Silicone Sheets: These are self-sticking, reusable patches. You just cut them to fit over the scar and wear them for several hours each day to keep the scar hydrated and protected.
Silicone works by creating a protective barrier that locks in moisture. This hydrated environment helps regulate collagen production, which is key to preventing the body from creating the thick, raised tissue that leads to ropey or discolored scars.
The Technique of Scar Massage
Beyond silicone, scar massage is a hands-on technique that physically breaks down and softens the healing tissue. A few minutes a day helps to break up dense collagen, boost blood flow, and make the scar more flexible so it doesn’t feel tight.
You don’t need special tools, just your fingertips. Apply a bit of moisturizer or your silicone gel to prevent friction, and then use firm, steady pressure.
You aren't just rubbing the surface of your skin. The idea is to actually move the scar tissue itself. You’ll know you’re doing it right when you see the skin lighten slightly under your finger's pressure.
I suggest this simple routine for about five minutes, once or twice a day:
- First, use two fingers to press and make small circles along the entire scar.
- Next, gently move the scar up and down, perpendicular to the incision line.
- Finally, gently stretch the scar from side to side.
Consistent massage helps keep the scar from sticking to the deeper tissues, which is particularly important for tummy tuck and breast surgery incisions. Understanding the different breast lift incision types can also help you anticipate your specific scar pattern and care needs.
Why Sun Protection is Non-Negotiable
I can't stress this enough: UV radiation is the worst enemy of a new scar. For the first year, your scar tissue has very little of the natural pigment (melanin) that protects skin from the sun.
Exposing a new scar to UV rays can cause it to darken permanently, a condition we call post-inflammatory hyperpigmentation. This dark discoloration is often much more noticeable than the scar line itself. For at least the first year after surgery, you have to be diligent.
- Cover It Up: Your best bet is a physical barrier. Simply keeping the scar covered with clothing is the most effective method.
- Use High-SPF Sunscreen: If you can't cover the scar, apply a broad-spectrum, mineral-based sunscreen with an SPF of 30 or higher. If you’re outdoors, you must reapply it every two hours.
Studies have shown that sun exposure can increase the risk of a scar becoming hyperpigmented by as much as 50%. Committing to this scar therapy and sun protection routine is how you protect your investment and ensure your final result is as seamless as possible.
Your Incision Care Questions Answered
Properly caring for your incisions is one of the most critical parts of your recovery. It directly impacts your healing and the final appearance of your scars. Here are the answers to the questions my patients ask most often as they navigate the post-operative process.
How Long Will My Stitches Stay In?
This all comes down to the type of suture I used to close your incision. In many cases, I use absorbable sutures placed beneath the skin. These dissolve on their own over several weeks or months, so you’ll never see them and they don’t need to be removed.
If you have visible, non-absorbable stitches on the surface, we will typically take those out in the office between 5 and 14 days after surgery. The exact timing depends on the procedure and how quickly that specific part of the body heals.
I will always be very clear about which type you have and when your follow-up for removal is scheduled. The most important thing is to never try removing stitches on your own.
When Can I Stop Covering My Incision?
As a general rule, your incision should remain covered as long as it has any drainage or until the skin edges are fully sealed. For most of my patients, this takes about 7 to 14 days.
This is a decision I make for each patient individually during our follow-up visits. Some incisions, even after they've closed, benefit from the extra support of surgical tape (like Steri-Strips) for a few more weeks to help the early scar mature.
Once the incision is fully healed and no longer needs a dressing for protection, we transition to scar therapy. This usually means covering the area with silicone sheeting or applying a silicone gel to optimize the final result. Always follow the specific timeline we give you in the office.
This progression protects the new skin when it’s most fragile and then supports it as it gets stronger.
Is It Normal for My Incision to Be Itchy?
Yes, itching is an extremely common part of the healing process. It’s actually a good sign. As the tiny nerve endings in the skin begin to regenerate and heal, they send signals that your brain often interprets as an itch.
While it can be frustrating, it means your body is hard at work. The key is to resist the urge to scratch at all costs. Scratching can easily damage the delicate new skin, introduce bacteria, and make your final scar worse.
If the itching is becoming a major nuisance, here are a few things you can do:
- Gently pat the skin near the incision, but never directly on it.
- Apply a cool compress (wrapped in a clean cloth) to the area for a few minutes at a time.
- Keep the skin moisturized once I give you the go-ahead, as dry skin often intensifies itching.
If you notice spreading redness, a rash, or any new drainage along with the itching, call our office immediately. It could signal an allergic reaction to an adhesive or the beginning of an infection.
Why Does My Incision Look Puckered or Uneven?
It’s completely normal for a new incision to look a bit bunched-up, puckered, or uneven. In fact, this is often done intentionally when I close the incision. By gathering the skin slightly, I can ensure the deeper tissue layers come together securely.
This technique is designed to produce a much flatter, finer scar in the long run. As your body heals over the next 6 to 12 months, that initial puckering will relax, soften, and smooth out on its own.
Once I clear you to begin, usually around the 3 to 4-week mark, gentle scar massage will also help accelerate this softening process. While it can look a little strange at first, it's a normal part of the healing journey toward an excellent outcome. Be sure to point out any areas of concern during your follow-ups so we can monitor them together.
At the office of Michael A. Bain, MD, we believe clear communication and personalized guidance are essential for a smooth recovery. If you have questions about achieving your aesthetic goals, we invite you to schedule a consultation to discuss your options.